How I Photographed Napoleon During the Solar Eclipse
An image like this does not really happen by chance. You have to anticipate, scout the location, choose your equipment, calculate your viewpoint and, above all, be ready to walk a lot on the day. But even with all that preparation, there is still a good dose of luck.
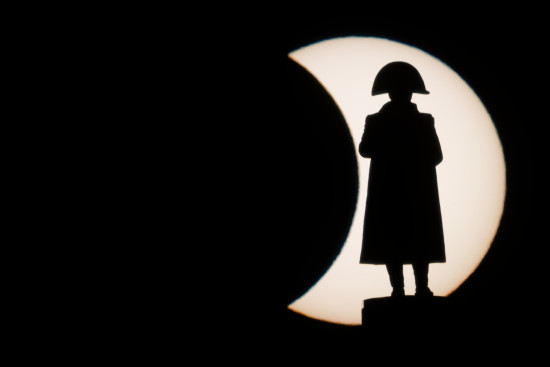
Probably the best photograph in this series, taken at the end of the partial solar eclipse observed above the Grande Armée column, at 8:40 p.m.
The Sun, partially obscured by the Moon, appears to sit behind Napoleon’s silhouette.
PHOTO JOHAN BEN AZZOUZ / LA VOIX DU NORD
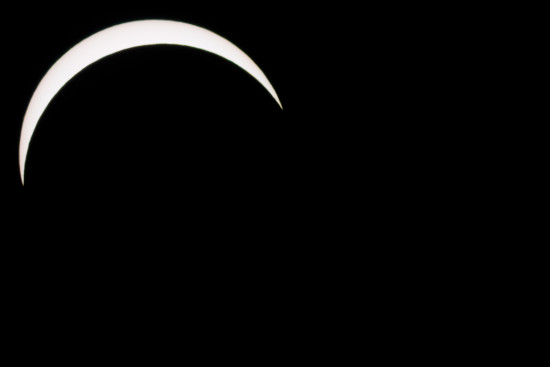
Let’s say this is not a particularly interesting image: we have all taken one like it, and it can be made anywhere the solar eclipse is partial. But I took it anyway at the time of maximum eclipse (90.9% maximum obscuration of the solar disk at Wimille, around 8:14 p.m.).
PHOTO JOHAN BEN AZZOUZ / LA VOIX DU NORD
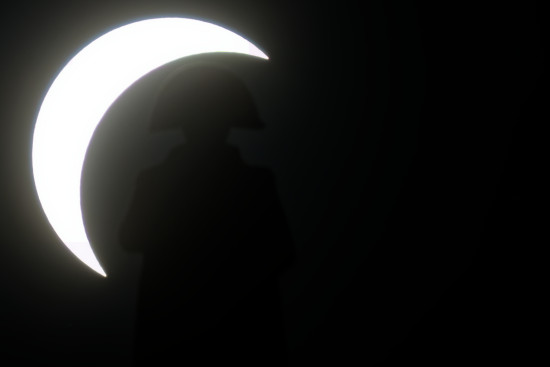
In this series, during which I took photographs from 7:15 p.m. to 8:45 p.m., there was also this image: the statue in the Moon’s shadow. But the effect is very subtle and, in the printed newspaper, it risked becoming invisible during printing.
PHOTO JOHAN BEN AZZOUZ / LA VOIX DU NORD
Why Did I Choose Napoleon?
Early in the year, when the media began announcing the August 2026 solar eclipse, I started thinking about a possible image featuring the Grande Armée column in Wimille. Photographing an eclipse is one thing, but adding an element that immediately places the image geographically seemed much more interesting to me. I wanted people to understand at a glance that the eclipse had been photographed in the Boulonnais area. The Grande Armée column, with Napoleon’s silhouette, was perfect for anchoring the image in the local landscape. And, as a bonus, it is only five minutes from my home and I know the area very well.
I had also considered the statue of the Virgin Mary at the top of Notre-Dame Cathedral in Boulogne-sur-Mer, which would also have immediately located the photograph. But the urban environment would have made scouting and alignment with the Sun even more complicated.
1. Planning Ahead for the Solar Filter
At the end of July, I ordered an ND 100,000 solar filter, because I suspected that stock shortages would become inevitable as the eclipse approached. And indeed, a few days before the event, it had become almost impossible to find one, either in stores or online.
In my case, I chose the ND 100,000 because it was the only model still available in a 77mm diameter, which matches the filter diameter of my Canon RF 100-500mm.
A solar filter is essential for photographing the Sun directly. Its light is extremely intense and, when concentrated by a telephoto lens, can damage the sensor and some internal components of the camera. But the most important risk, of course, concerns your eyes.
A filter intended for solar photography must therefore be designed for that purpose and placed at the front of the lens.
“ND” stands for Neutral Density. My ND 100,000 reduces exposure by about 16.6 stops and lets through only about 0.001% of the light.
There are also ND 1,000,000 solar filters, which reduce the light even further: one millionth versus one hundred-thousandth, or about 3.3 additional stops.
The choice depends in particular on the shooting conditions and the filter being used, but in all cases you must use a filter specifically designed for photographing the Sun.
The difference is also important for the photographer. With a DSLR and its optical viewfinder, sunlight passes through the lens and reaches the eye through the viewfinder system. Looking at the Sun through an optical viewfinder without suitable protection can cause serious and irreversible eye damage.
With a mirrorless camera, such as my Canon R3, the viewfinder is electronic: you are looking at an image displayed by the sensor rather than directly at sunlight through the optical system. This is therefore much safer for the eyes, but it absolutely does not eliminate the need for a solar filter, because the sensor and lens remain exposed to solar radiation.
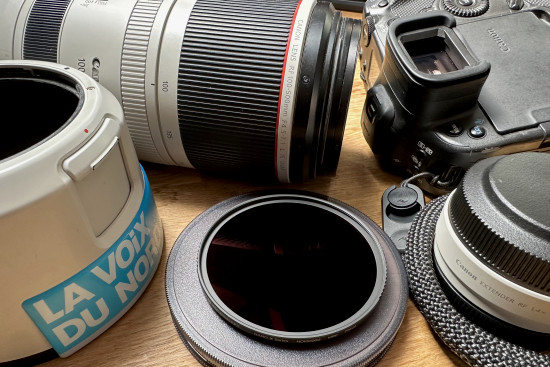
The K&F Concept filter with UV/IR protection.
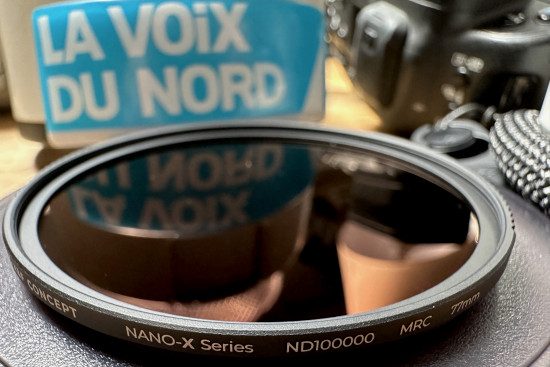
An ND100,000 solar filter with a 77mm diameter.
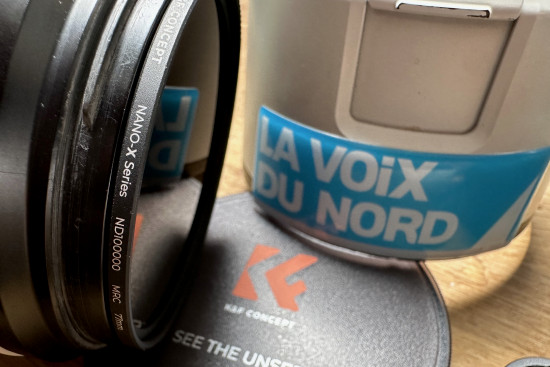
It lets through only about 0.001% of the light (16.6 stops).
2. The First Scouting Trip
On Sunday evening, I went to scout the area around the column. I first stopped by around 6:30 p.m., then returned between 8 and 9 p.m. to see exactly how the Sun would position itself relative to Napoleon.
Very quickly, I realized that the trees around the column would seriously complicate the operation, and I more or less abandoned the idea of making the photograph from that location.
But I know the area well, and another possibility came to mind: the Carrefour car park in Saint-Martin-Boulogne, which is close to the column.
The problem was that on Sunday evening, when I was there, the Sun was already too low to verify precisely that the alignment would work on Wednesday.
So I had to trust the scouting and return on the day of the eclipse.
3. 1,140mm to Find the Alignment
For this photograph, the Canon RF 100-500mm with the RF 1.4x extender was the obvious choice. The extender already turns the 500mm into a 700mm lens.
For the first time, I also used the APS-C 1.6x crop mode on my Canon R3. It further multiplies the framing by 1.6, giving an equivalent field of view of 1,140mm.
This is a particularly interesting mode in this kind of situation, even though you lose resolution: the R3 goes from 24 million to around 9 million pixels.
For this image, this compromise was not a problem for me. The main objective was to achieve precise framing and alignment between the Sun and the statue.
The choice of settings was then dictated by the equipment and the conditions. With the 1.4x extender, the RF 100-500mm has a maximum aperture of f/10 at this focal length.
I therefore used f/10 and ISO 2500 to obtain a shutter speed of 1/640 s.
Below that, even with image stabilization, I would have taken a greater risk of camera shake with such a long focal length. And ISO 2500 is still perfectly usable in a RAW file, especially since I subsequently process my images with DxO PhotoLab and its DeepPRIME XD3 noise reduction.
For focusing, I alternated between autofocus and manual focus, generally set to infinity, depending on whether autofocus locked on correctly or not.
For this final photograph, autofocus worked without any problem.
I used the low-speed continuous shooting mode to increase my chances of getting the perfect moment and alignment.
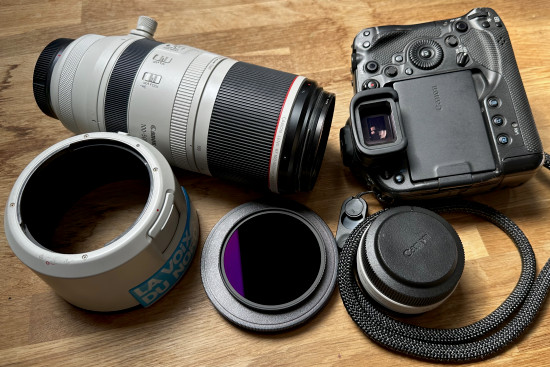
All the equipment needed: a Canon R3 body, a Canon RF 100-500mm L lens, a Canon RF 1.4x extender, the ND 100,000 filter and the lens hood. No tripod, as it would have limited my mobility.
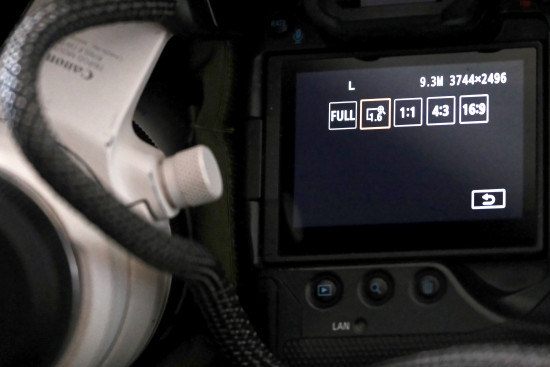
The APS-C 1.6x crop mode on my Canon R3. It further multiplies the framing by 1.6, giving me an equivalent field of view of 1,140mm. Resolution then drops from 24 MP to around 9 MP.
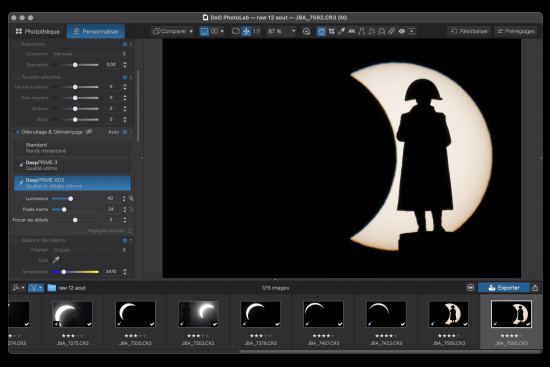
Post-processing the .CR3 RAW file from my R3 in DxO PhotoLab 9 before exporting it as a JPG: very little retouching was needed, just noise reduction with DeepPRIME.
4. The Day of the Eclipse (August 12, 2026): Two Hours and About 8 Kilometers
On August 12, I did not expect to walk so much. But once you get started, you quickly get caught up in it: you test one location, realize the alignment is not ideal, look for another, and sometimes return to the first one. After two hours, I had walked about 8 kilometers around the column.
The final photograph was taken at 8:40 p.m. from the Carrefour car park in Saint-Martin-Boulogne. The Grande Armée column is about 54 metres high and, as the Sun descends, you gradually need to move farther back to keep the statue aligned. At the beginning of the eclipse, I was too close to fit Napoleon’s entire silhouette inside the Sun. By the end, the Sun was low enough and I had enough distance to get the framing I was hoping for.
With a 1,140mm equivalent field of view, the perfect alignment between Napoleon and the Sun lasts only three or four seconds in the viewfinder. The Earth’s rotation is then enough to immediately shift the framing. You therefore have to keep moving, slightly to the left and backwards, to regain the alignment. I made these movements almost blindly, while still checking regularly what was behind me, about every thirty seconds.
Getting Napoleon exactly inside the Sun can sometimes come down to a matter of metres. A tree or a car in precisely the wrong place and the image becomes impossible. The car park was almost empty, particularly because the shopping centre closes at 7:30 p.m., which greatly reduced the risk of having a car in the line of sight. And above all, from this location, Napoleon’s entire silhouette fit inside the Sun. I was almost at the far end of the car park and had very little room left to move backwards.
A Photograph That Was 50% Preparation and 50% Luck
In the end, I got the image I had been hoping for from the beginning. On Sunday, during the first scouting trip, I had already managed to place Napoleon’s hat inside the Sun, but without the eclipse and at a very tight framing. It was interesting, but the entire silhouette was obviously much more spectacular.
However, I did not have complete control over what I could place inside the Sun: it depended on the Sun’s height and therefore on how far back I needed to be to fit the top of the column into the alignment. Preparation was therefore essential, but it was not enough.
The conditions also had to be favourable. I was lucky to have a sufficiently clear sky: with heavy cloud cover, all this preparation would have been useless. Visibility could also have been compromised by a forest fire that broke out a few kilometres away, around Hardelot and Dannes. The smoke seriously threatened shooting conditions, and some photographers in the area even had to rethink their plans at the last minute.
And above all, Napoleon’s silhouette had to fall exactly inside the Sun. This was something I could not control: the position of the Sun, the height of the column and my viewpoint all had to line up at exactly the right moment. I could prepare the conditions, but I could not guarantee the result.
In the end, I would therefore say that this image is probably an equal mix of preparation and luck. Once the photograph was taken, I sent it to my editor. I immediately knew that, in my eyes, it was the most spectacular image in the series.
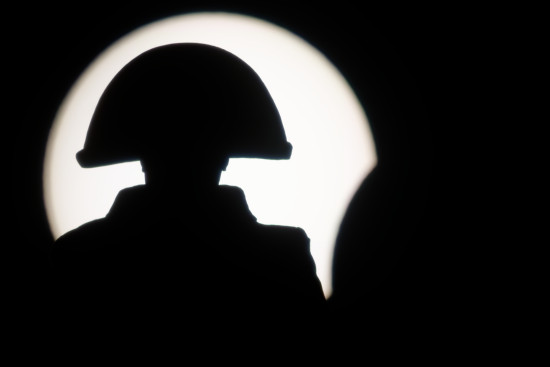
One of my first attempts: it is 7:23 p.m., the Sun is still high, so I am very close to the column and the framing of the statue is still very tight on Napoleon’s hat.
PHOTO JOHAN BEN AZZOUZ / LA VOIX DU NORD
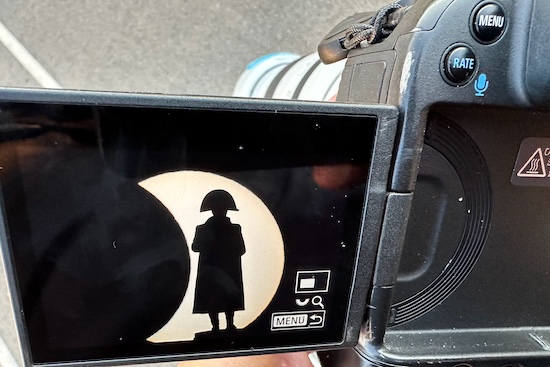
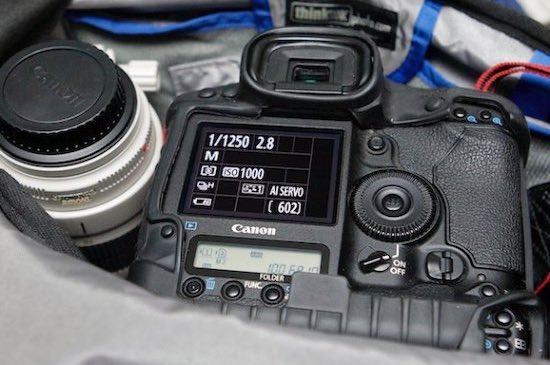
Immediately after getting the photograph I was aiming for, I photographed the R3 screen from the Wimille car park to let my editor know by text message that the result looked good and that he could potentially alert the chief editor!
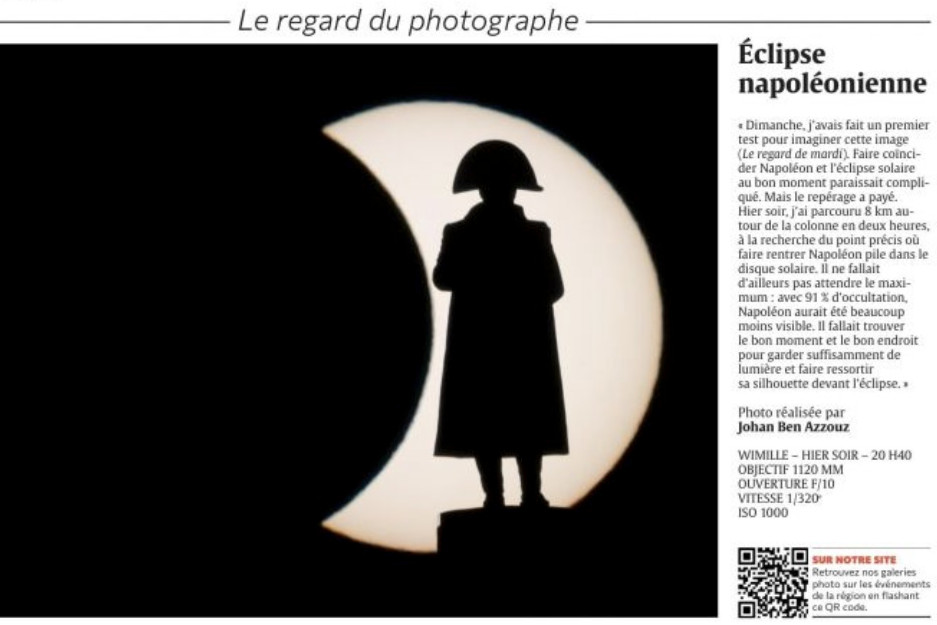
And the following day, August 13, the result was printed in the newspaper “La Voix du Nord”, my employer, on page 2, for the “Le regard du photographe” feature. I was on holiday, so I was not supposed to be taking eclipse photographs, but it was worth experiencing that moment!
A Few Tips for Photographing a Solar Eclipse
Photographing an eclipse first and foremost requires planning your image in advance. If you want to include a monument, building or another element inside the Sun, scouting is essential: you need to know the Sun’s trajectory, its altitude at the time of the eclipse and the distance you need to achieve the desired framing.
For a solar eclipse, safety must remain the priority. Use only a solar filter suitable for photographing the Sun and correctly attached to the front of the lens. Never look at the Sun through the optical viewfinder of a DSLR without suitable solar protection.
A mirrorless camera is safer for viewing thanks to its electronic viewfinder, but the filter remains essential to protect the equipment.
A long focal length gives the Sun a strong presence and makes it possible to fit a distant subject inside its disk, but it also makes alignment extremely precise.
The longer the focal length, the more even the smallest movement translates into a significant change in framing.
A tripod or monopod can help depending on the situation, but in my case mobility was essential to follow the alignment as the Earth rotated.
Finally, do not neglect your settings and make a few test shots before the crucial moment.
Shutter speed, aperture and ISO will need to be adapted to your filter, your lens and the lighting conditions.
And above all, plan your image before the eclipse: on the day itself, you will have much less time to think.
To Finish:
I obviously do not claim to have the absolute truth about eclipse photography: in fact, this was my first time; when the previous one occurred in 1999, I was not interested in photography.
But many of you asked me about the “making-of”.
This image simply reflects the way I prepare and create this type of photograph, with the equipment I have available.
It can probably be improved and criticised, so take from these tips whatever may be useful to you.
One thing is certain: for this kind of image, preparation gives you the best possible chance, but it can never completely eliminate the element of chance.