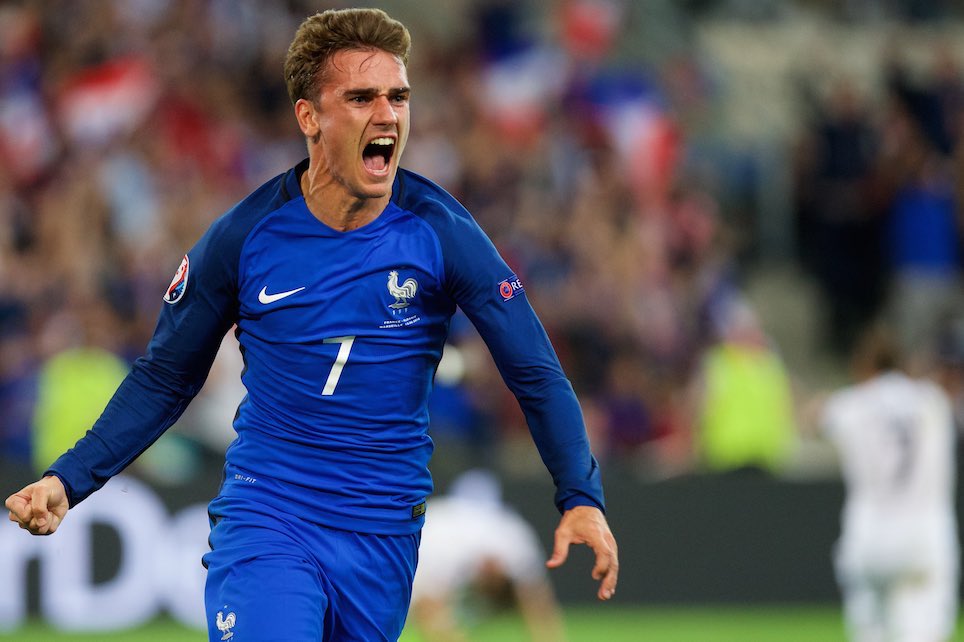
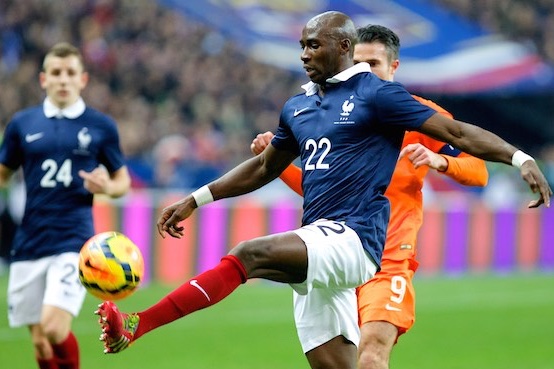
1DX – 300mm – 1/1250 – 2500 ISO – f/2.8

How to photograph sports?
Sports photography is a relatively difficult field to master, but it is fascinating. It requires a high level of concentration and a good knowledge of the discipline being photographed in order to anticipate key actions and moments. Unfortunately, high-end equipment is often preferable (fast lens, camera with a fast burst rate) is often essential.
1DX – 300mm – 1/1250 – 2500 ISO – f/2.8
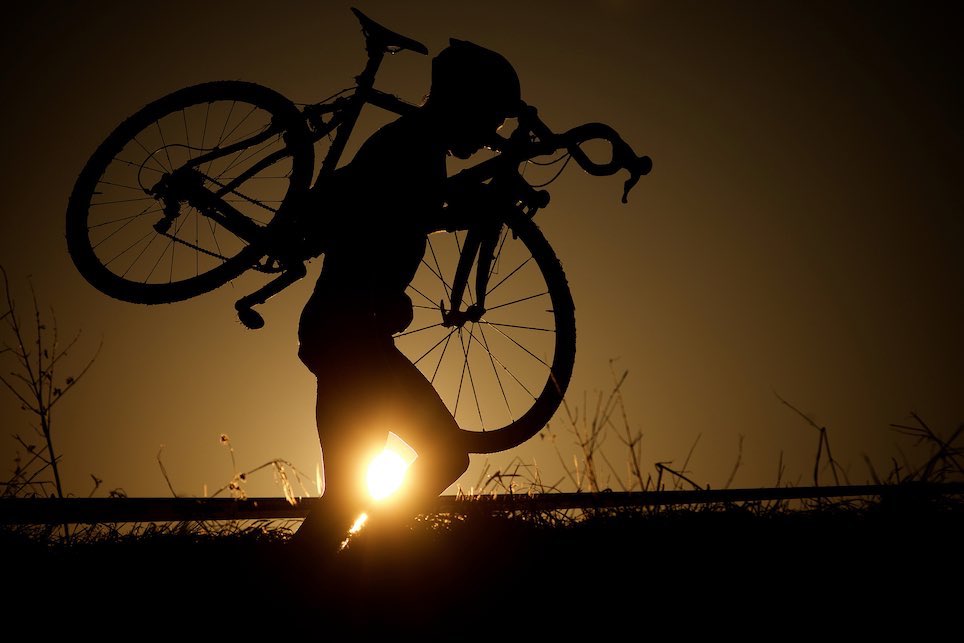
1DX – 200mm – 1/2000 – 200 ISO – f/5.6
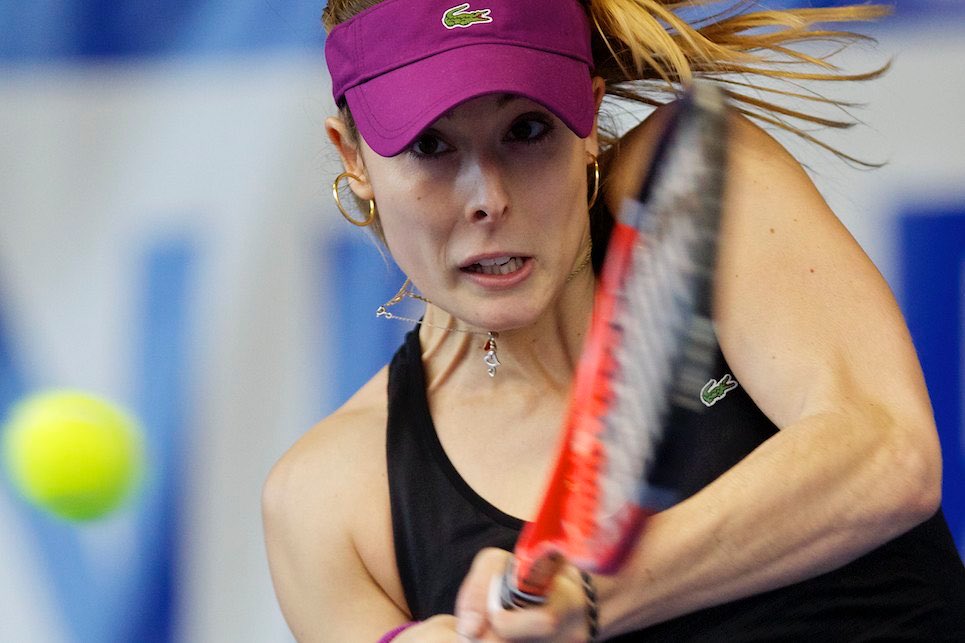
1DX – 300mm – 1/1250 – 2500 ISO – f/2.8
A camera with very responsive autofocus (AF) and a good burst rate is preferable (otherwise, you will need to anticipate well). Good high-ISO performance is also essential, especially for indoor or night sports: 2500 to 3200 ISO for top-level football, and often 5000 or 6400 ISO in most sports complexes not intended for professional athletes.
The camera should be paired with a lens with a wide maximum aperture (f/2.8 or f/4 minimum) and a long focal length (200 mm minimum).
In short, sports photography unfortunately requires heavy and expensive equipment to achieve a good result, especially when lighting conditions are poor, although everything depends on what you mean by “good”.
Reassuringly, to photograph your kid during a daytime football match, you do not need €5,000 worth of equipment.
During the day, with entry-level equipment (250D or 4000D paired with a relatively slow 70-300 lens opening at, for example, f/5.6), daylight makes it easy to shoot sports such as football or rugby, a good opportunity to try sports photography. To keep the cost down, you can also buy used equipment, notably on Leboncoin.
As a reminder, for this type of photograph, the shutter speed should be set to at least 1/500 to freeze the athlete’s movement. It is all about compromise, depending on the available light.
With a lower-end camera in particular, it is preferable to shoot at 1/500 - f/5.6 - 500 ISO rather than 1/1000 - f/5.6 - 1000 ISO, since noise increases as ISO sensitivity increases.
On a high-end camera (1DX, D6), the quality difference between ISO 500 and 1000 is small, so it is much less of a problem to prioritize shutter speed to freeze movement perfectly.
In fact, most sports photographers favor a high shutter speed at the expense of a little potential grain caused by raising ISO sensitivity; the same applies to us at the La Voix du Nord / La Voix des Sports photo desk. I agree with this approach when the available equipment allows it (a recent, at least mid-range camera), and in my day-to-day sports coverage I very rarely go below 1/1000 s.
When light is scarce, using a mid-range or high-end camera (R6, R7, etc.), paired with a bright telephoto lens (70-200, 300, 400mm, minimum f/2.8), becomes essential. The poor lighting in most sports complexes forces photographers to push their equipment to the limit of what is reasonable (6400 ISO or even 12800, 1/500, f/2.8). The use of a speedlight is strongly discouraged: it is also prohibited in many sports (table tennis in particular), and except in special cases the result is very poor.
| Difficulty | Low (daytime) and moderate (night). Also see this specific tutorial on football photography. |
| Lenses | 70-200 2.8 (close action, warm-up), 300 2.8 (slightly more distant action, close-up, player or staff portrait), 16-35 2.8 (dynamic pre-match images, benches). The 300 has the advantage of separating the background well. |
| Position | Sitting, ideally on a fishing stool (available at Decathlon/Go Sport for less than ten euros or in hunting/fishing shops), beside the goal and behind the touchline if space allows: this is not always tolerated by the match delegate and/or referee, but this position allows you to shoot great aerial duels. |
| Daytime ISO sensitivity | 100 to 800 depending on the weather|
| Nighttime ISO sensitivity | 2500 to 3200 (L1 / L2), 4000 to 12800 (amateur football, adapted to the stadium lighting) |
| Shutter speed | 1/1000 for a very sharp image, 1/1600 if possible. In all cases, do not go below 1/500. |
| Aperture | f/2.8 to f/5.6 |
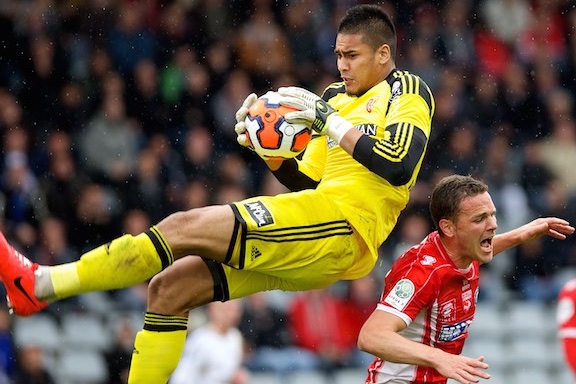
1DX – 300mm – 1/1000 – 4000 ISO – f/2.8
1DX – 300mm – 1/800 – 4000 ISO – f/2.8
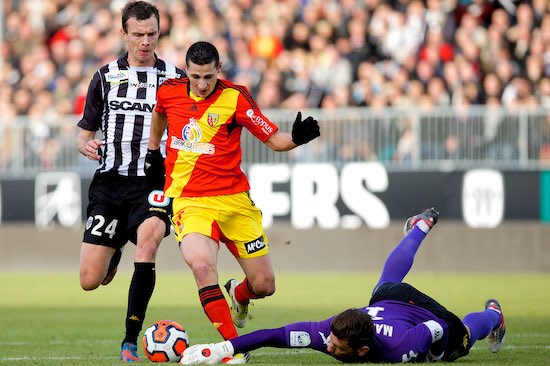
1DX – 300mm – 1/1000 – 3200 ISO – f/2.8
| Difficulty | Low (daytime) and moderate (night). Quite similar to football. |
| Lenses | 70-200 2.8 (close action), 300 2.8 (slightly more distant action, close-up, portrait): as with football, the 300 has the advantage of separating the background well. |
| Position | Sitting to avoid heads being cut off in the background, on a stool or on the grass, beside the goal line or behind the dead-ball line. |
| Daytime ISO sensitivity | 100 (sun) to 800 (cloudy) |
| Nighttime ISO sensitivity | 2500 to 3200 (TOP14, Pro D2), 4000 to 12800 (federal and regional level) |
| Shutter speed | 1/1000 for a very sharp image, 1/2000 if possible. |
| Aperture | f/2.8 to f/5.6 |
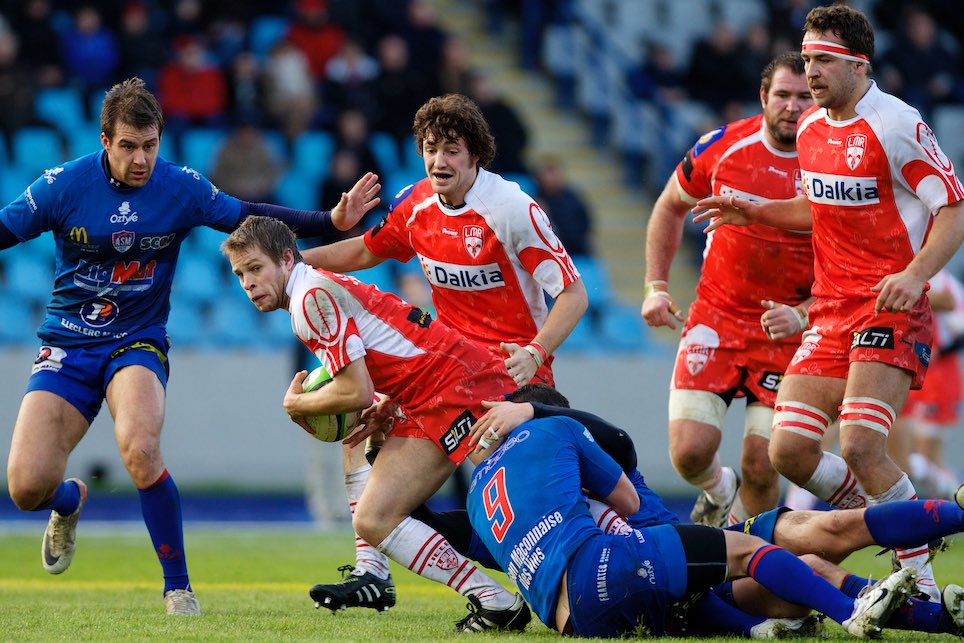
1DX – 200mm – 1/1250 – 500 ISO – f/2.8
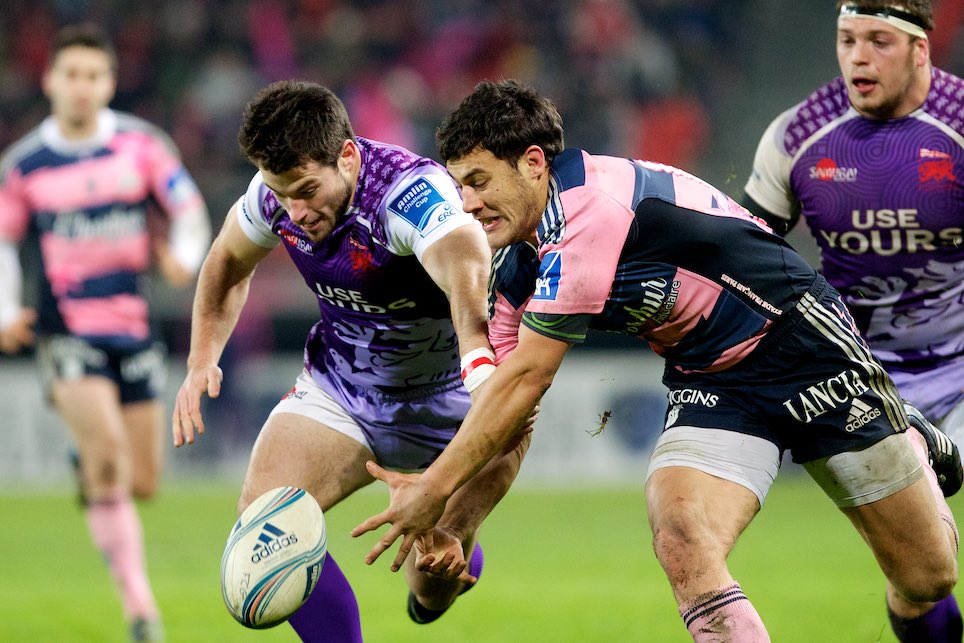
1DX – 300mm – 1/1000 – 4000 ISO – f/2.8
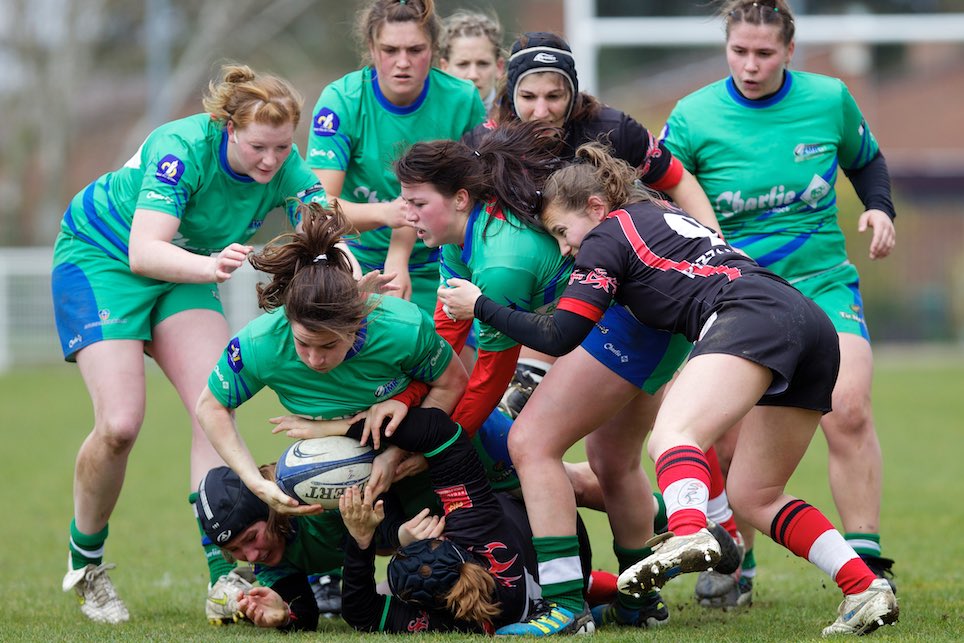
1DX – 300mm – 1/1600 – 200 ISO – f/2.8
| Difficulty | Moderate |
| Lenses | 70-200 2.8 (action), 300 2.8 (close-up, portrait), 16-35 2.8 (bench, atmosphere with the coach), 24-70 (close action under the basket). If you had to choose just one, the 70-200 would be the obvious choice! |
| Position | On the floor (to avoid heads being cut off in the background), underneath the basket or to the side of the basket. |
| ISO sensitivity | 3200 to 5000 (Jeep Elite, Pro B, N1), 5000 to 12800 (amateur basketball) |
| Shutter speed | 1/1000 for a very sharp image; 1/500 can work if the light is really poor, but do not go below it. |
| Aperture | f/2.8 to f/4 |
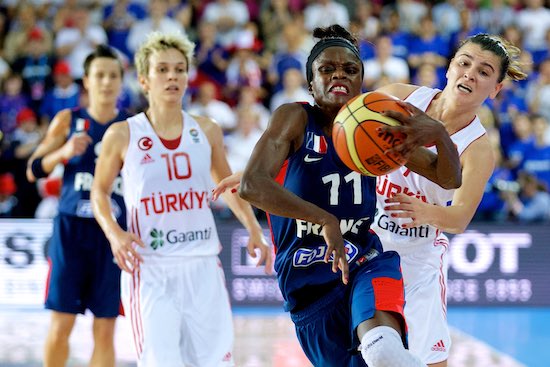
1DX – 125mm – 1/800 – 5000 ISO – f/2.8
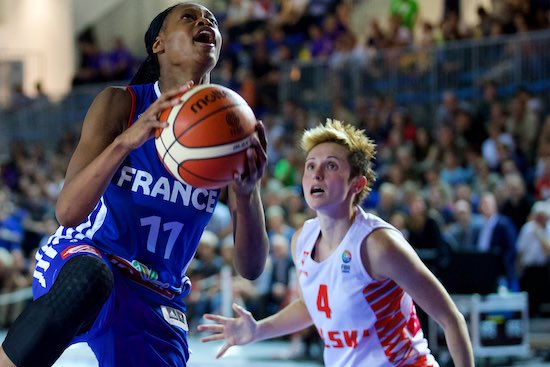
1DX – 90mm – 1/1000 – 6400 ISO – f/2.8
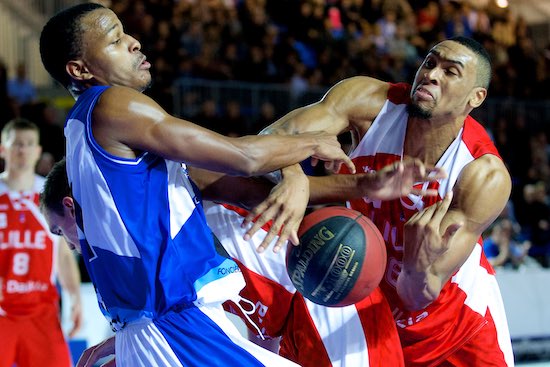
1DX – 75mm – 1/1000 – 5000 ISO – f/2.8
| Difficulty | Moderate |
| Lenses | 70-200 2.8 (action), 24-70 (close action). If you had to choose just one, the 70-200 would once again be the most practical! |
| Position | On the floor (to avoid heads being cut off in the background), beside the goal. Referees switching sides may make this position awkward, but it is the best position. Introduce yourself to the match delegate or referees to agree on where you can stand without getting in the way. |
| ISO sensitivity | 3200 to 6400 |
| Shutter speed | 1/1250 minimum for a very sharp image, especially during a shot. Below this speed, the attacker’s hand and/or arm may be slightly blurred. But once again it is all about compromise: 1/800 at 3200 ISO is preferable to 1/1600 at 6400 ISO if your camera is not good at handling noise. |
| Aperture | f/2.8 to f/4 |
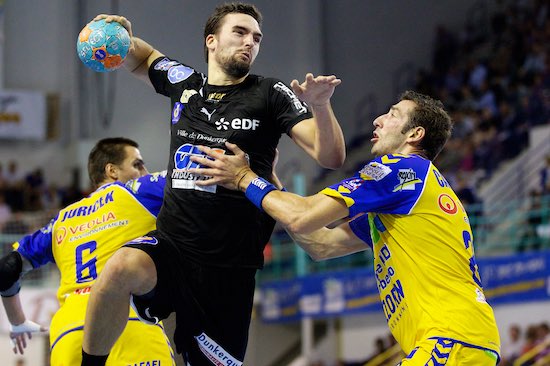
1DX – 110mm – 1/1250 – 3200 ISO – f/2.8
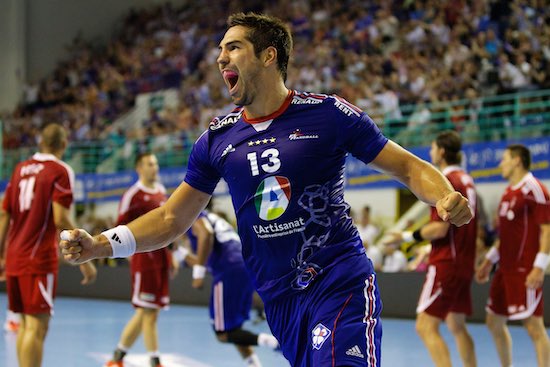
1DX – 75mm – 1/1000 – 4000 ISO – f/2.8
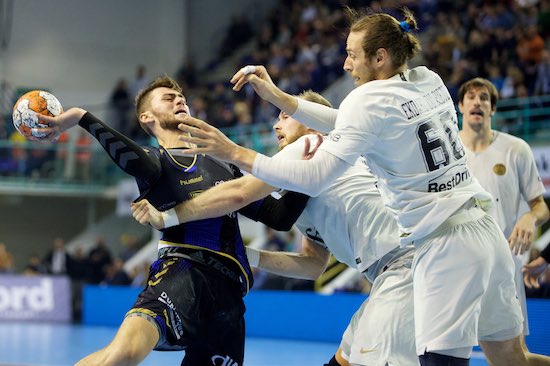
1DX – 110mm – 1/1000 – 5000 ISO – f/2.8
| Difficulty | High: in my opinion it is the most difficult sport to photograph (along with water polo), especially women’s volleyball. |
| Lenses | 70-200 2.8 (action at floor level), 16-35 2.8 (bench/coach atmosphere), 300 2.8. If you had to choose just one, the 300 without hesitation. Volleyball is probably the most difficult sport to cover; to get good photographs, you need to spot an attacker and follow them through the viewfinder until a possible attack, especially with the 300mm, because following the ball is virtually impossible. Unlike football or rugby, which are fairly easy sports to photograph, anticipation is essential in volleyball photography: you really have to read the game and be very observant. |
| Position | On the floor with a 70-200 to shoot receptions by the libero, for example, or standing from a high position or behind the service area with a 300mm for attacks and defensive blocks. |
| ISO sensitivity | 3200 to 6400 |
| Shutter speed | 1/1000 minimum for a very sharp image. But as with other sports, you can always drop to 1/500 if the light is very poor. |
| Aperture | f/2.8 to f/4 |
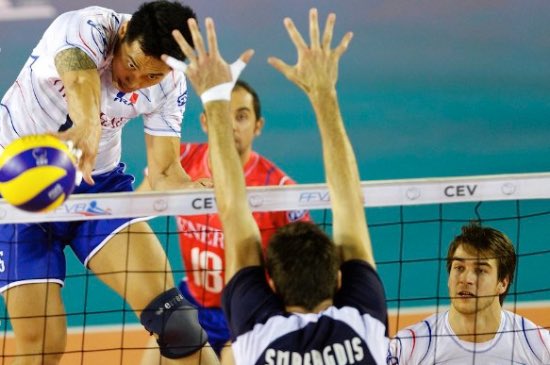
1DX – 300mm – 1/1250 – 3200 ISO – f/2.8
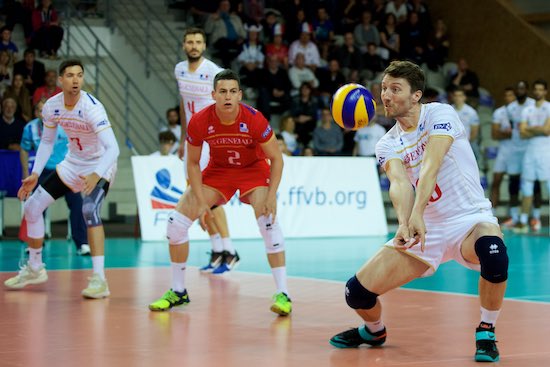
1DX – 80mm – 1/1000 – 2500 ISO – f/2.8
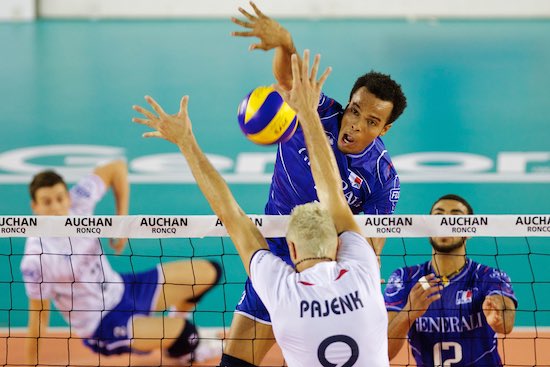
1DX – 300mm – 1/1000 – 3200 ISO – f/2.8
| Difficulty | Moderate |
| Lenses | 70-200 2.8, 16-35 2.8, 300 and 400mm |
| Position | If you have photographer accreditation, you can position yourself as close as possible, without putting yourself in danger and while following the marshals’ instructions. Ideally, have spectators in the background. Without accreditation, you are part of the public: arrive early to choose your position well in advance. Position yourself to get the most appealing background possible. You can also scout for puddles to create reflections or water spray, and places where cars are likely to leave the ground. |
| ISO sensitivity | 100 (sun) to 6400 (night stage, or shaded woodland) |
| Shutter speed | 1/500 minimum to freeze the image, but frozen wheels in a rally are... ugly. Create a nice panning shot using shutter speeds of 1/100 to 1/160: the image will be much more dynamic thanks to the sense of speed created by this effect. |
| Aperture | f/2.8 to f/5.6, up to f/14 for panning if there is plenty of light. You can also use an ND filter to reduce incoming light and reduce depth of field. |
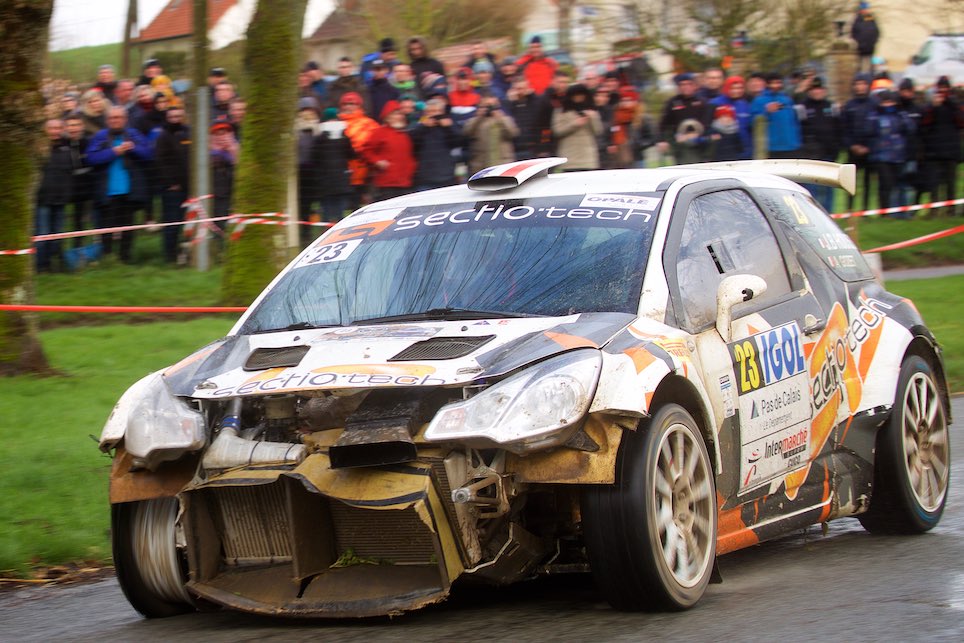
1DX – 100mm – 1/160 – 250 ISO – f/7.1
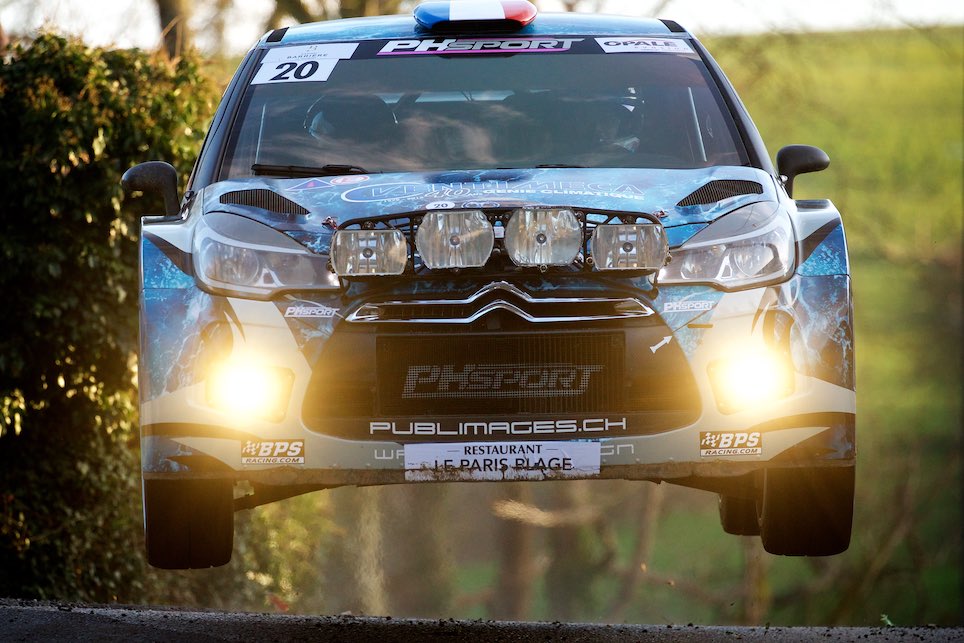
1DX – 330mm – 1/800 – 2000 ISO – f/5.6
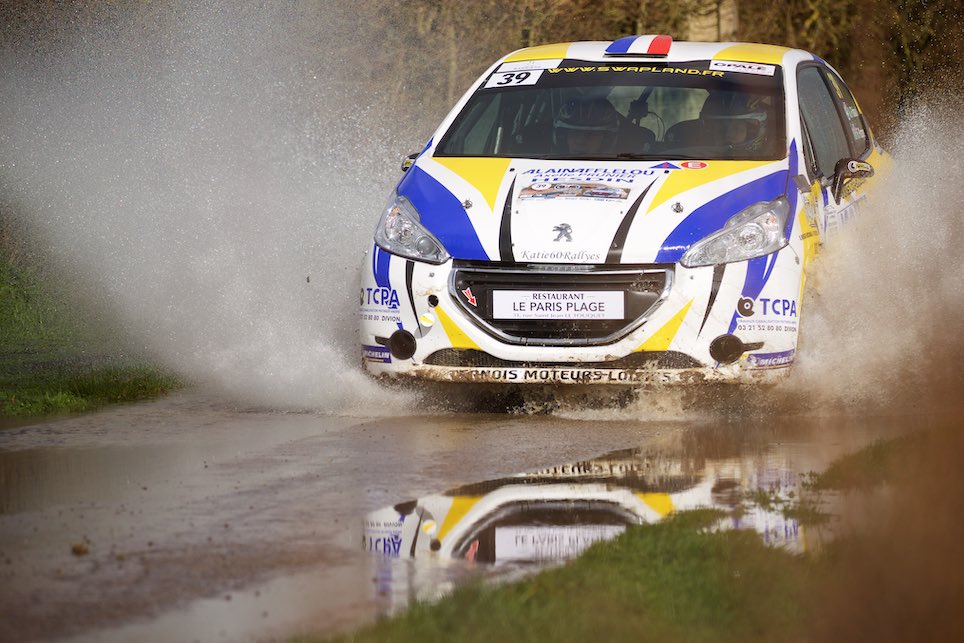
1DX – 260mm – 1/2000 – 250 ISO – f/5
| Difficulty | Moderate | |
| Lenses | 70-200 2.8, 16-35 2.8, 300 and 400mm | |
| Position | As with the rally above, if you have accreditation, you can position yourself close to the action while following the marshals’ instructions. | Ideally, you should also have a spectator area in the background. Otherwise, arrive early to find the best position. In CFS, the French sand-racing championship, look for sections of track with small bumps that allow a rider to be airborne in the foreground, with other riders on the ground or airborne in the background. Big jumps are also spectacular... when the sky is blue; otherwise the result is mediocre in bad weather. |
| ISO sensitivity | 100 (sun) to 1600 (bad weather) | |
| Shutter speed | 1/500 minimum to freeze the image, but frozen motorcycle wheels hide the sense of speed. Vary your output by creating panning shots at shutter speeds of 1/100 to 1/160. | |
| Aperture | f/2.8 to f/5.6, up to f/14 for panning if there is plenty of light. |
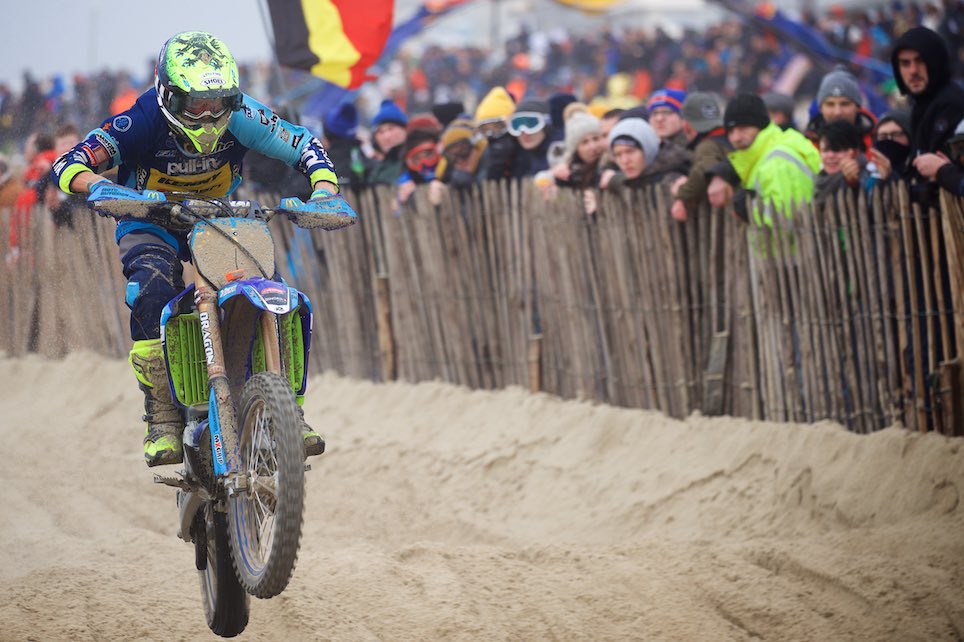
1DX – 250mm – 1/500 – 400 ISO – f/5
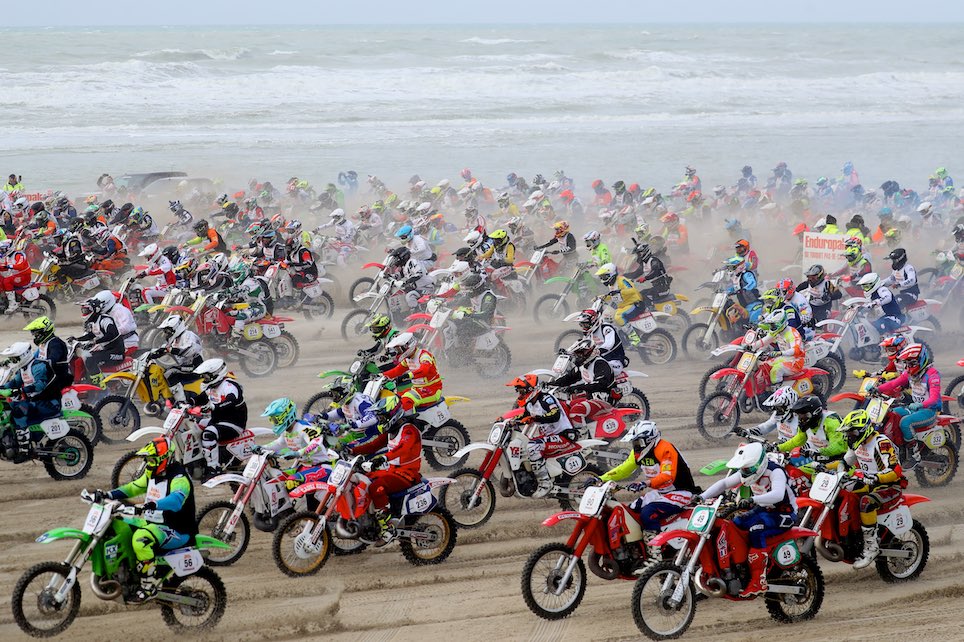
1DX – 120mm – 1/2000 – 640 ISO – f/5
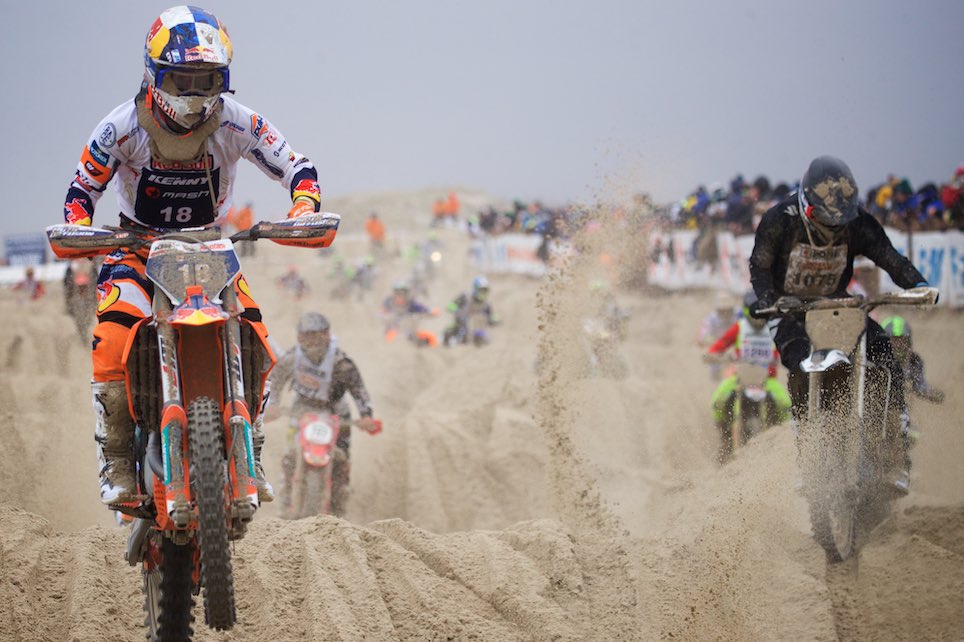
1DX – 180mm – 1/1600 – 800 ISO – f/5
| Difficulty | High (and even more so if there are shaded areas) |
| Lenses | 300 2.8 or 400 2.8, 70-200 2.8. If you had to choose just one: the 300 without hesitation, which allows very tight framing. |
| Position | On the floor or seated, at the edge of the court, at net height and on the side opposite the players’ bench. Respect the players’ concentration: silence is essential during important phases of play; the shutter burst should not be heard. |
Attention: respect the players’ concentration. Silence is essential during important phases of play; the shutter burst should not be heard.
| ISO sensitivity | 2500 to 12800 indoors, 100 to 800 outdoors |
| Shutter speed | 1/2000 for a perfectly sharp ball, but 1/800 and above works well. |
| Aperture | f/2.8 to f/5.6 |
1DX – 300mm – 1/1250 – 3200 ISO – f/2.8
1DX – 95mm – 1/1600 – 5000 ISO – f/2.8
1DX – 100mm – 1/1600 – 5000 ISO – f/2.8
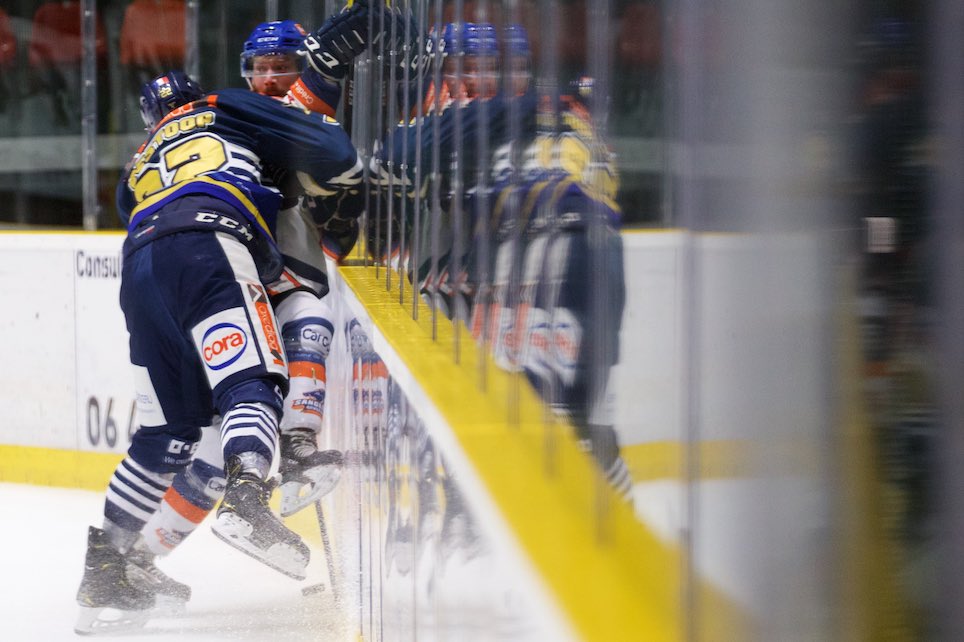
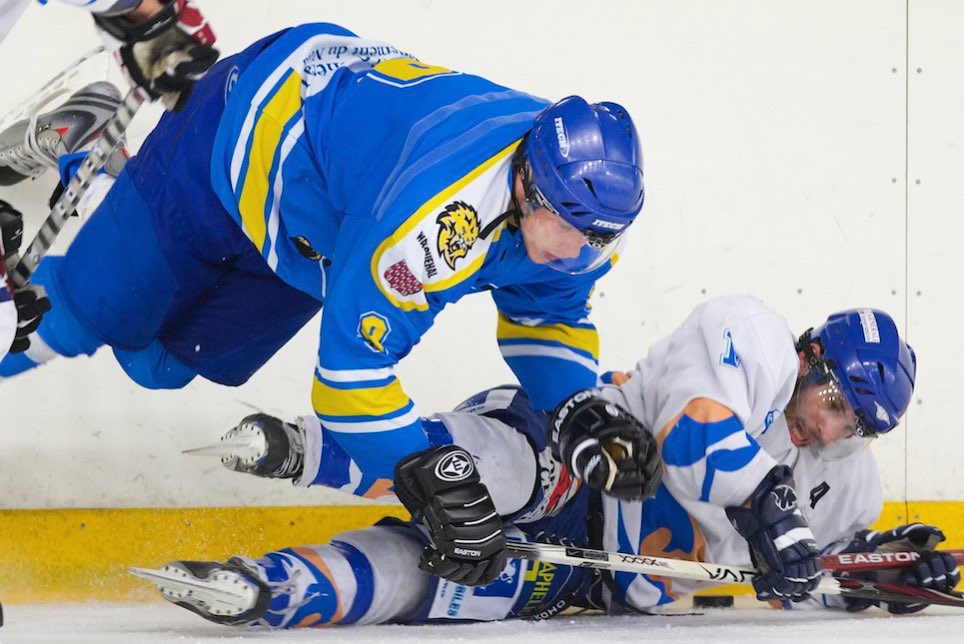
| Difficulty | High; it is not easy to get the puck in the image. |
| Lenses | 70-200 2.8, 24-70 2.8, 300 2.8 (for distant action or a close-up of a player, celebration scene). If you had to choose just one: the 70-200, which is very versatile for hockey. |
| Position | Standing near one of the two teams and close to the goal. Behind the plexiglass for your safety: watch out for the puck, which can cause serious injury! |
| ISO sensitivity | 1600 to 6400 depending on the rink. |
| Shutter speed | 1/1250 for a very sharp image. Make sure to overexpose by at least 1 EV for a properly exposed image (the ice can fool the exposure meter). |
| Aperture | f/2.8 |
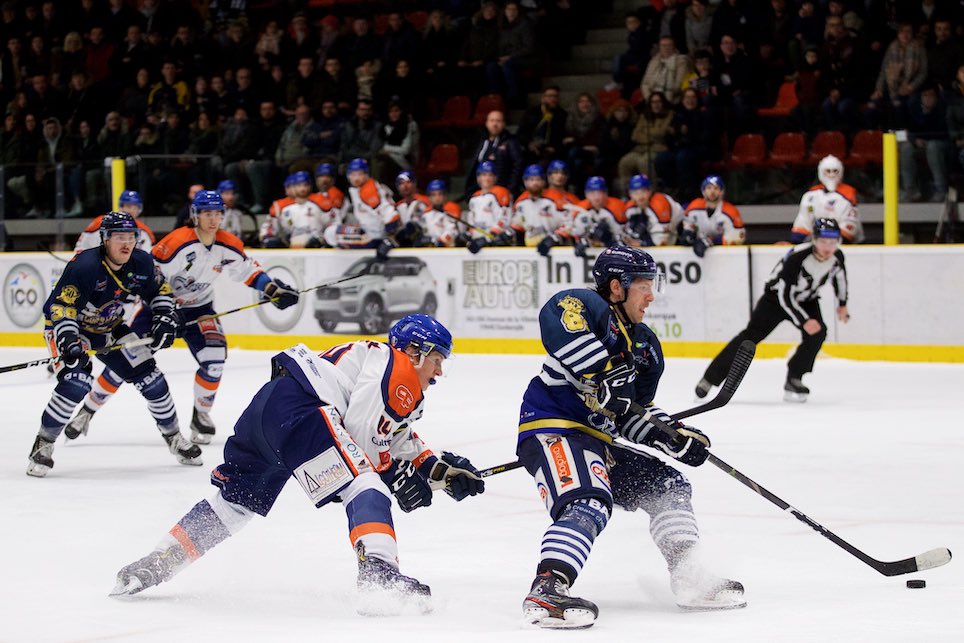
1DX – 100mm – 1/2000 – 5000 ISO – f/2.8
1DX – 120mm – 1/800 – 5000 ISO – f/2.8
1DX – 300mm – 1/400 – 3200 ISO – f/2.8
| Difficulty | High, but less difficult than ice hockey, even though getting the ball in the image remains difficult. |
| Lenses | 70-200 2.8, 24-70 2.8, 300 2.8 (for distant action or a close-up of a player, celebration scene). If you had to choose just one: the 300. |
| Position | Behind the goal line, to the side. Watch out for the very powerful ball and the sticks; as with ice hockey, they can cause serious injury! |
| ISO sensitivity | 100 (sun) to 1600 (very cloudy). |
| Shutter speed | 1/1600 for a perfectly sharp ball; you can go down to 1/500. |
| Aperture | f/2.8 to f/5.6 |
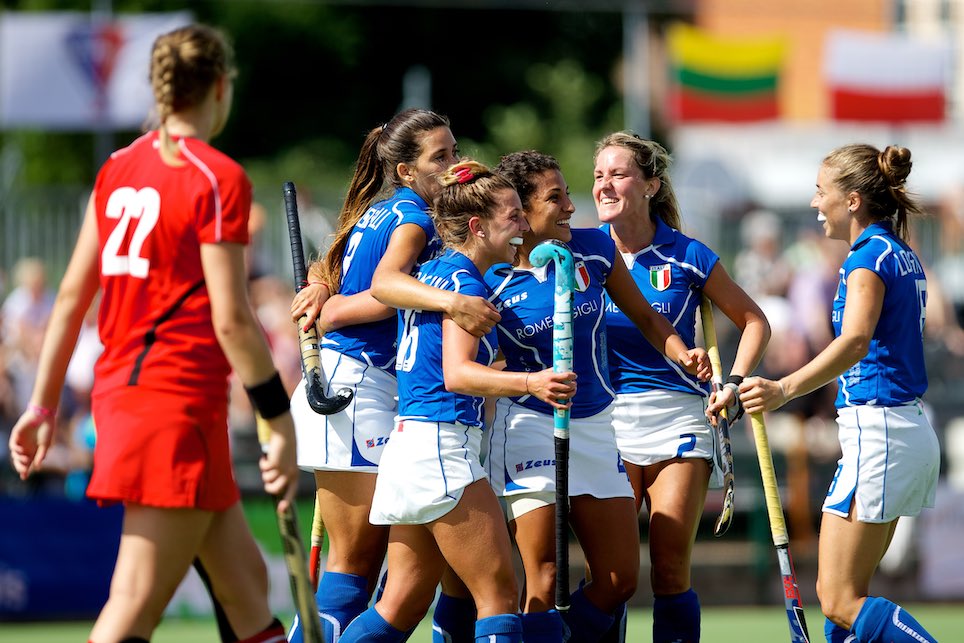
1DX – 300mm – 1/2000 – 100 ISO – f/2.8
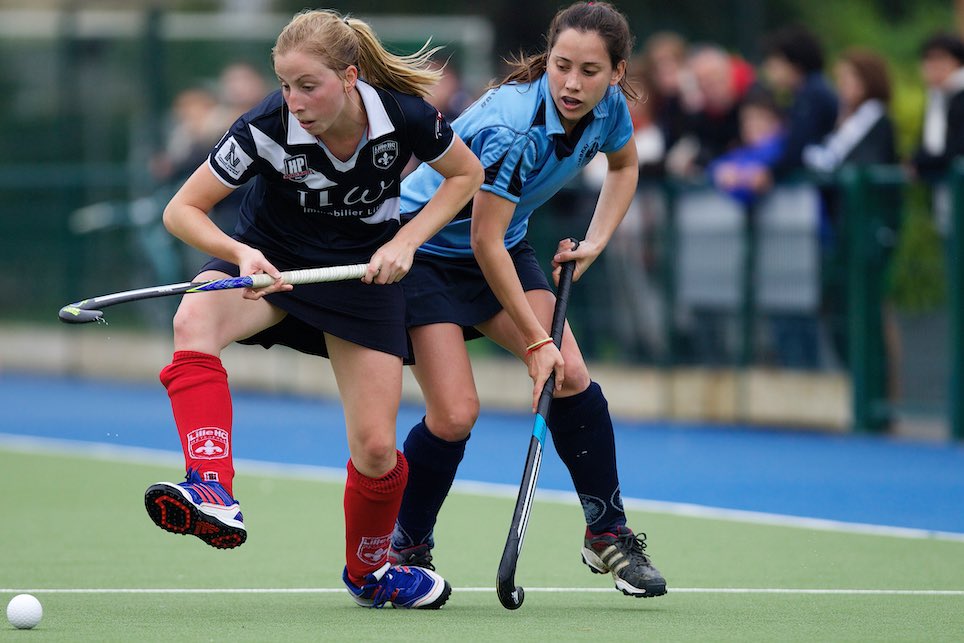
1DX – 300mm – 1/1600 – 500 ISO – f/2.8
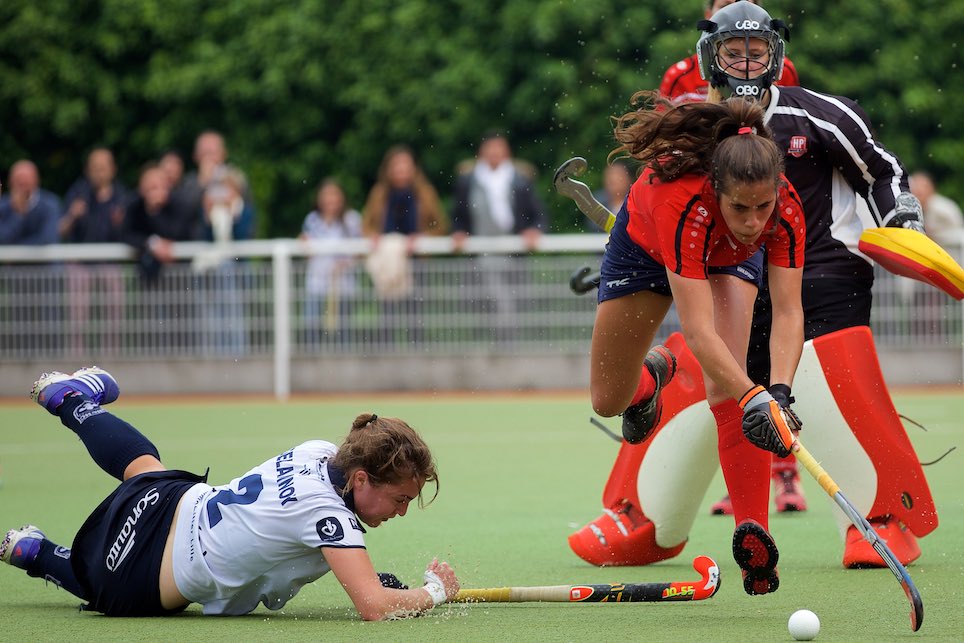
1DX – 200mm – 1/1600 – 250 ISO – f/2.8
| Difficulty | Moderate |
| Lenses | 70-200 2.8, 300 2.8 (for a close-up such as the photo at the top in the sand), 16-35 2.8 (for a start, for example) |
| Position | Preferably on the ground (again, to avoid heads being cut off in the background). For the start of a race with several hundred participants, ideally find a high position. |
| ISO sensitivity | 100/200 (outdoors), 3200/6400 (indoors) |
| Shutter speed | 1/800 minimum. |
| Aperture | f/2.8 to f/4 for photographing a single athlete, f/5.6 to f/8 for the start of a race with several hundred participants. |
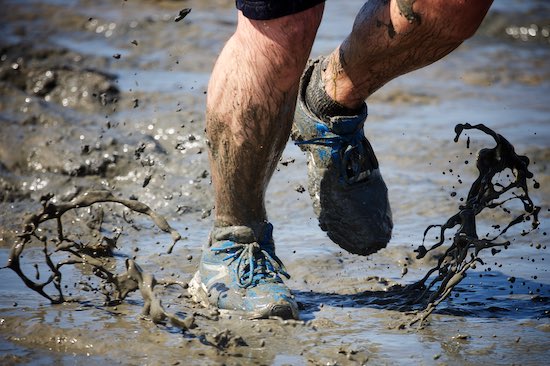
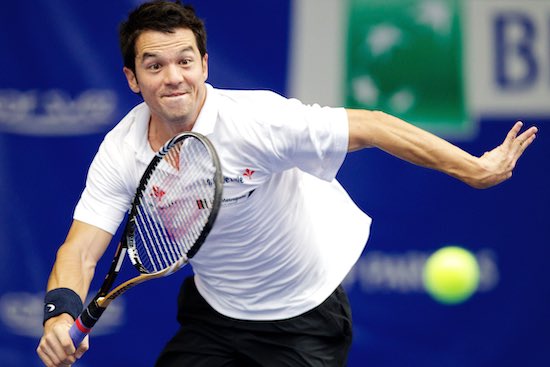
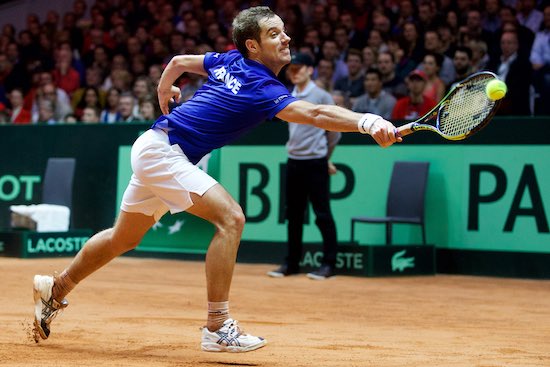
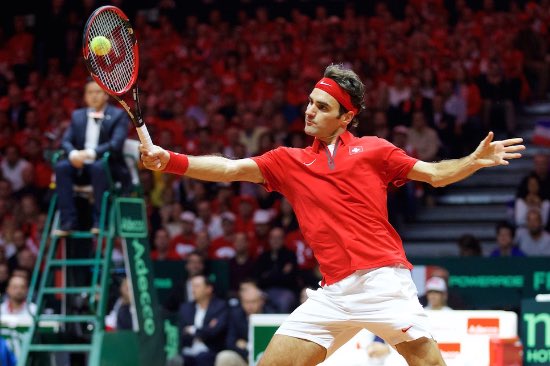
1DX – 350mm – 1/1000 – 400 ISO – f/5.6
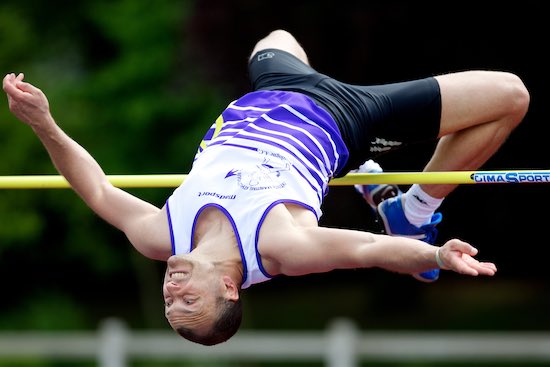
1DX – 300mm – 1/1600 – 400 ISO – f/3.2
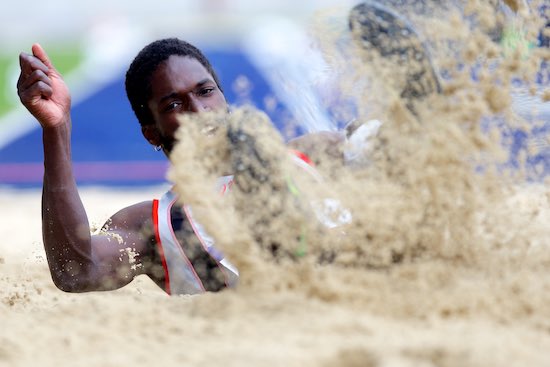
1DX – 300mm – 1/800 – 400 ISO – f/3.5
| Difficulty | Moderate |
| Lenses | 70-200 2.8 (versatile), 300 2.8, or 135 2. If you had to choose just one: the 300 2.8, which perfectly isolates the player. |
| Position | Seated facing the player you are following, if possible with spectators in the background. |
| ISO sensitivity | 2500 à 6400 |
| Shutter speed | 1/1000 for a very sharp image, 1/500 minimum. If there is little light, focus on slower phases such as serves (1/250 can work). |
| Aperture | f/2.8 |
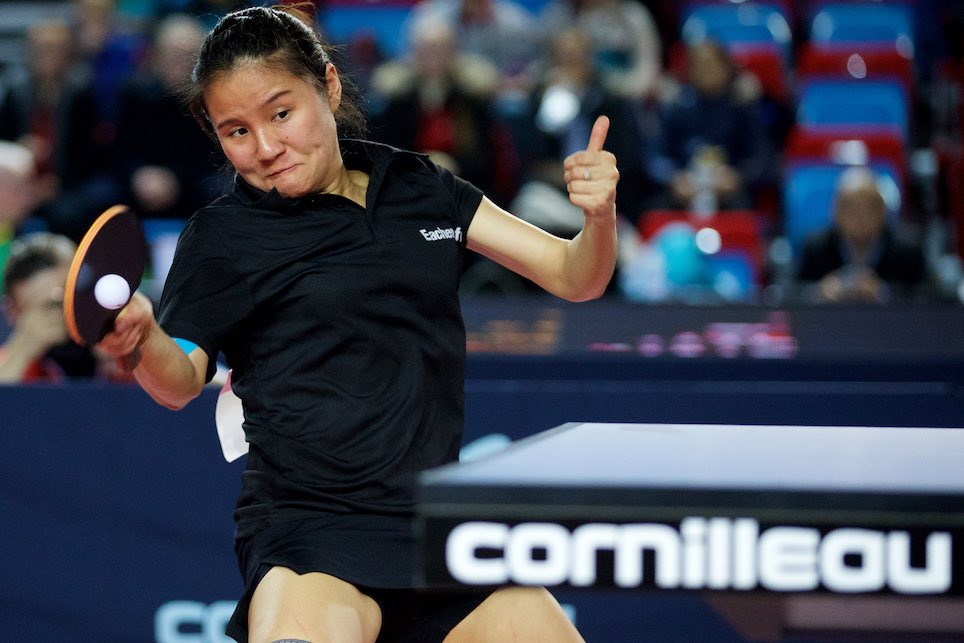
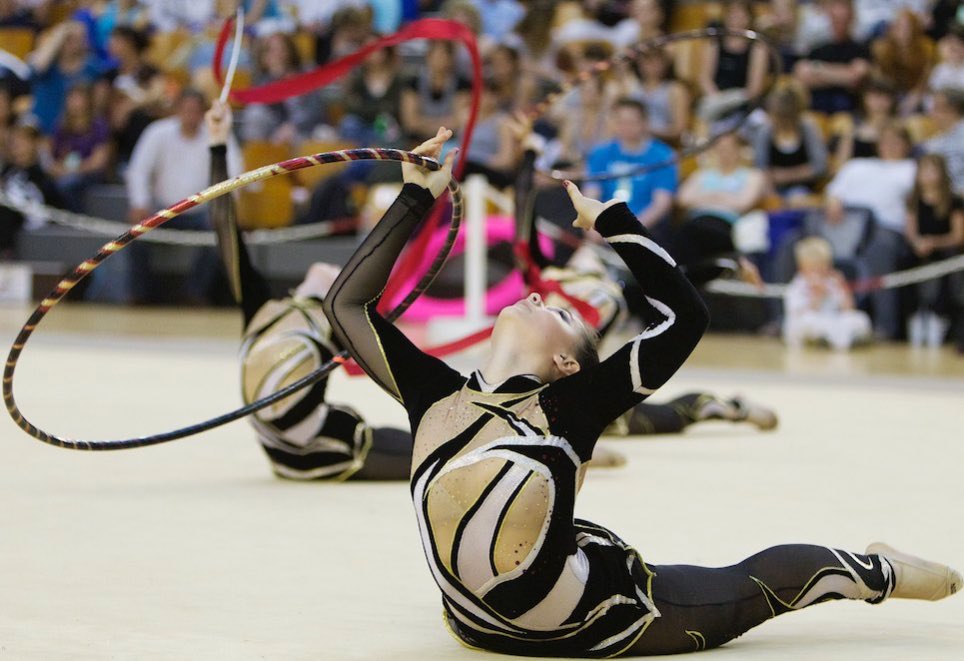
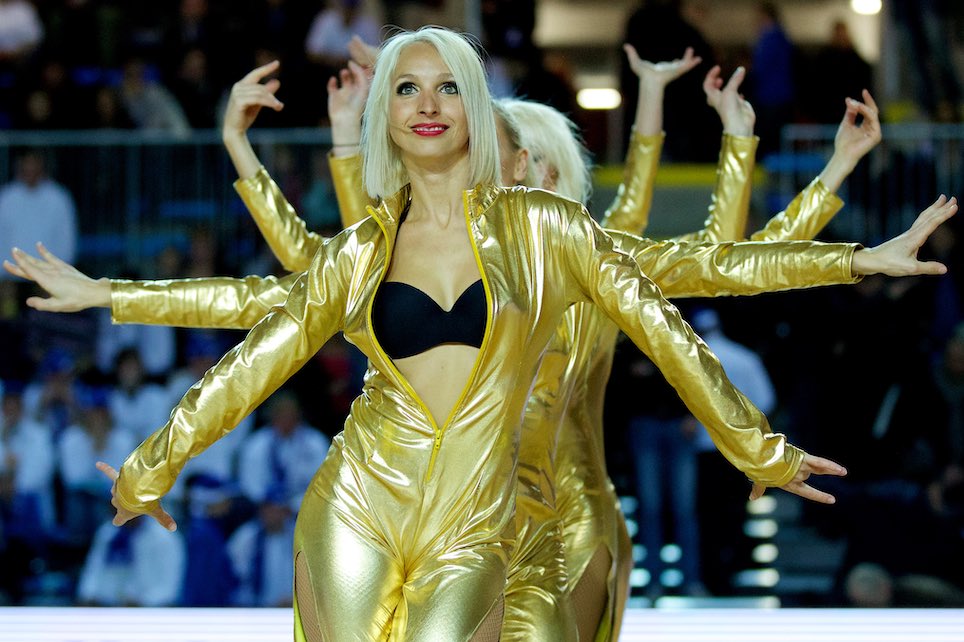
1DX – 135mm – 1/1600 – 6400 ISO – f/2.8
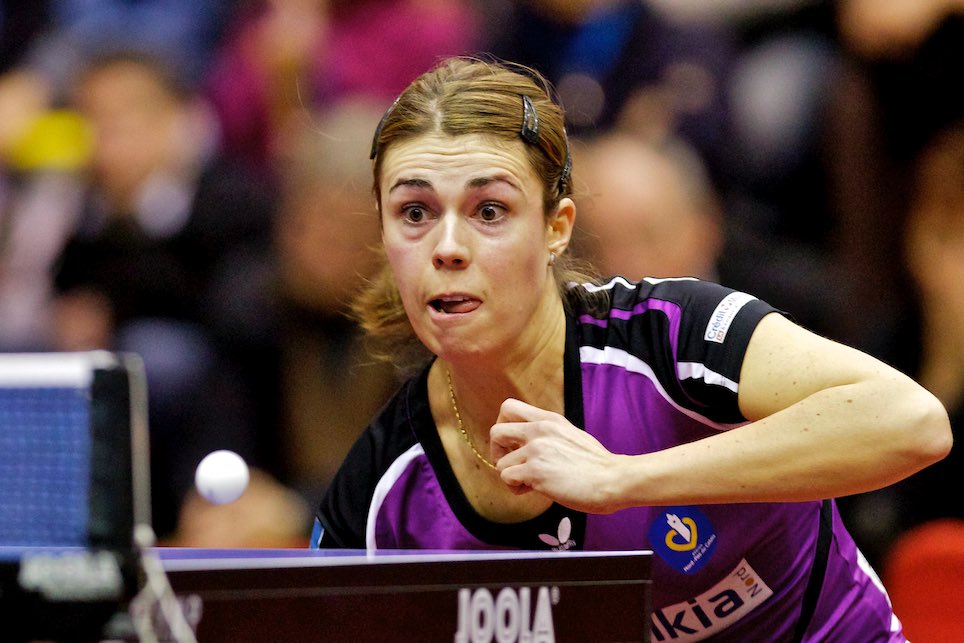
1D MKIV – 300mm – 1/400 – 6400 ISO – f/2.8
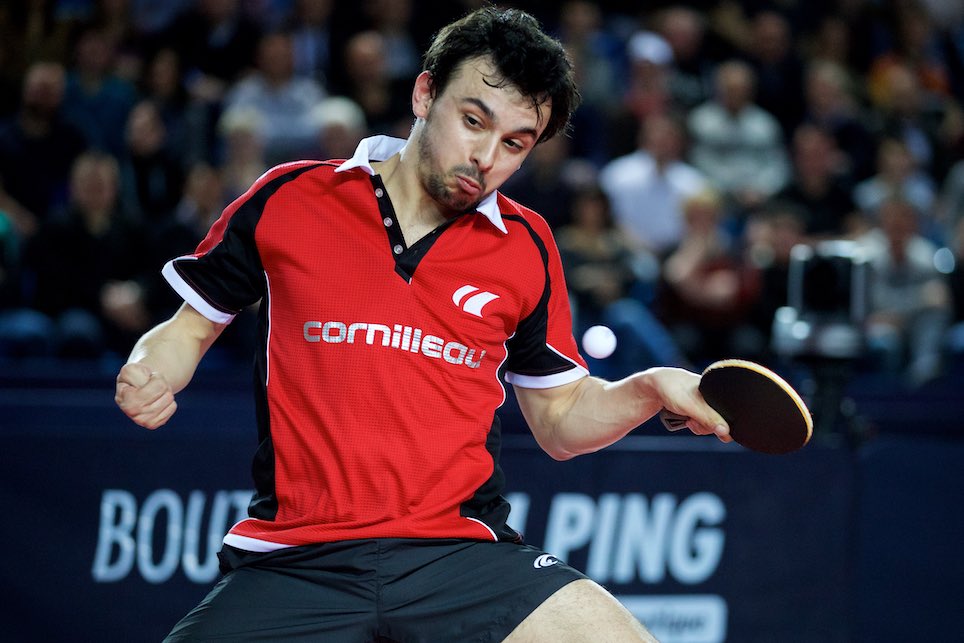
1DX – 140mm – 1/1600 – 6400 ISO – f/2.8
| Difficulty | Moderate |
| Lenses | 70-200 2.8, 300 2.8. If you had to choose just one: the 70-200, which as always is the most versatile. |
| Position | As close to the floor as possible, at the edge of the mat with the audience facing you so they appear in the background. You need to capture the elegance and aesthetics of the gymnast or dancer. |
| ISO sensitivity | 1600 to 6400 |
| Shutter speed | 1/500 minimum, preferably 1/1000 for a very sharp image. |
| Aperture | f/2.8 à f/4 |
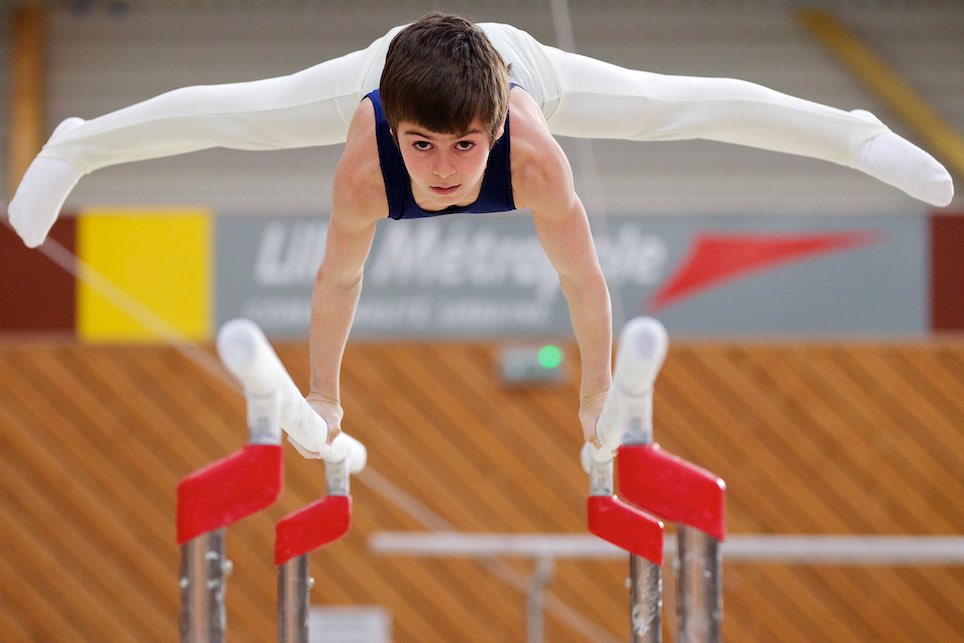
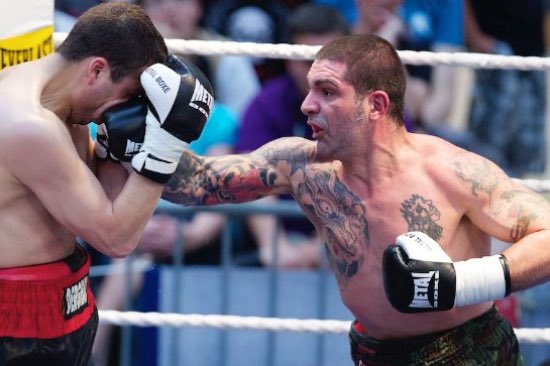
1D MKIV – 120mm – 1/2000 – 2500 ISO – f/2.8
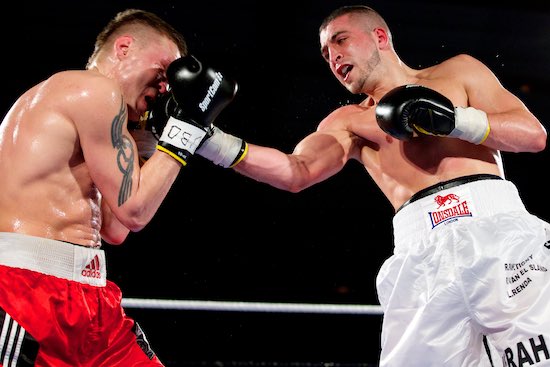
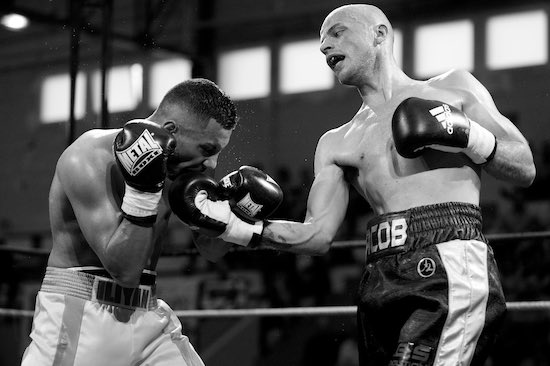
1D MKIV – 100mm – 1/1000 – 2500 ISO – f/2.8
1D MKIV – 100mm – 1/1600 – 2500 ISO – f/2.8
| Difficulty | High. It is not easy to anticipate an uppercut or a hook. |
| Lenses | 70-200 2.8 (action, boxer portrait), 16-35 2.8 (atmosphere with the coach), 300 2.8 (from a high position), 24-70 2.8 (close action). If you had to choose just one: the 70-200 without hesitation. |
| Position | On the floor at the edge of the ring (making sure not to obstruct spectators), and/or from a high position if the venue allows it. |
| ISO sensitivity | 3200 to 12800 |
| Shutter speed | 1/800 minimum, preferably 1/1600 for a very sharp image. |
| Aperture | f/2.8 |
1DX – 70mm – 1/640 – 6400 ISO – f/2.8
1DX – 100mm – 1/1600 – 5000 ISO – f/2.8
1DX – 300mm – 1/800 – 3200 ISO – f/2.8
| Difficulty | Moderate |
| Lenses | 70-200 2.8, 16-35 2.8 |
| Position | Preferably on the ground. For the start of a race with several hundred participants, ideally find a high position. For cyclocross, you can vary your angles very easily: a rider carrying the bike on their shoulder uphill, passing through a puddle, crossing a tree trunk... for a photographer, this discipline is a delight. |
| ISO sensitivity | 100 (sun) to 12800 (in shaded woodland during cyclocross) |
| Shutter speed | 1/800 minimum. |
| Aperture | f/2.8 to f/4 for photographing a single cyclist, f/5.6 to f/8 for the start of a race. |
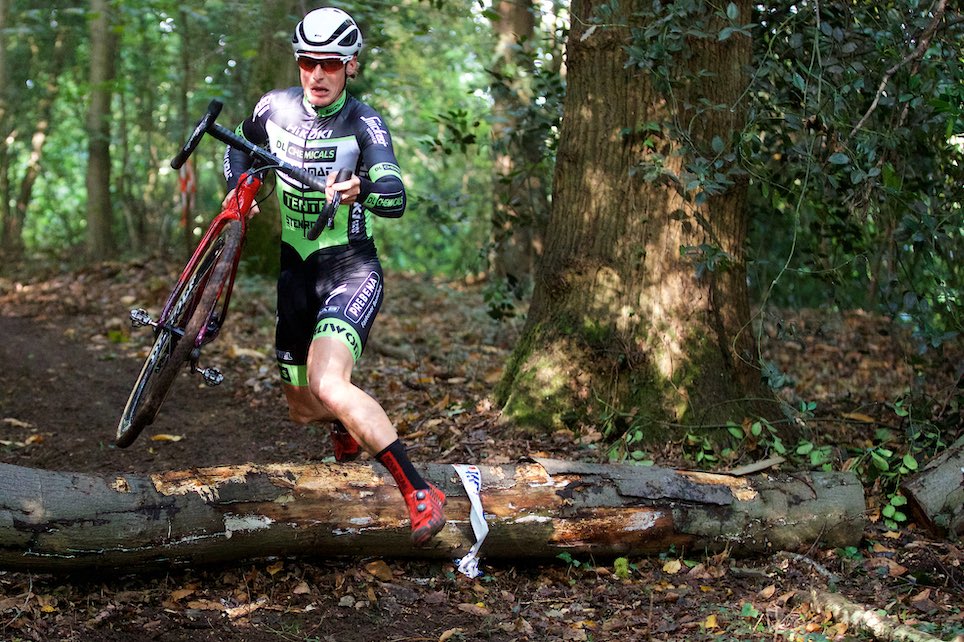
1DX – 70mm – 1/640 – 10000 ISO – f/2.8
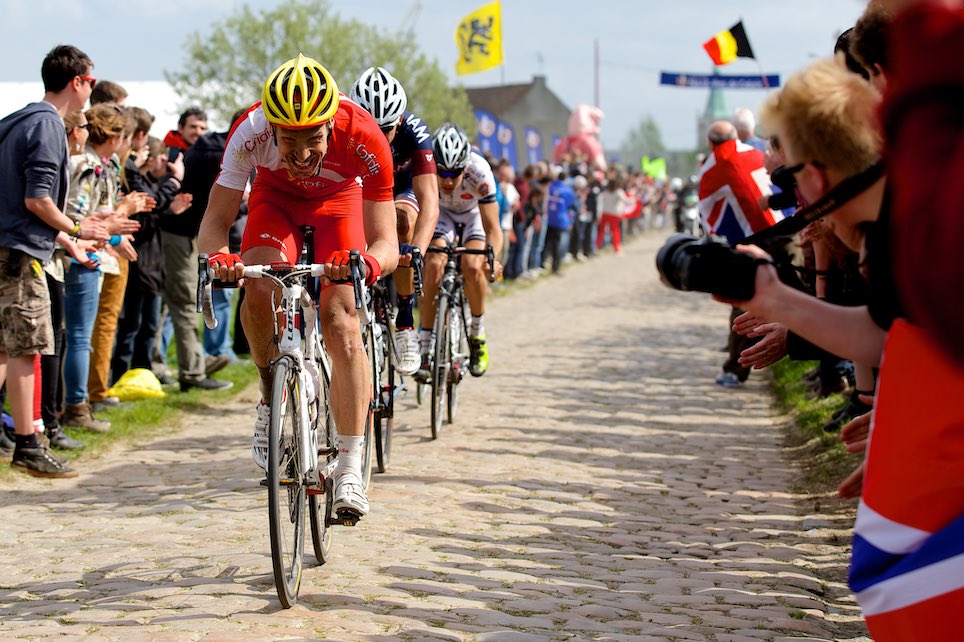
1DX – 100mm – 1/1000 – 400 ISO – f/4
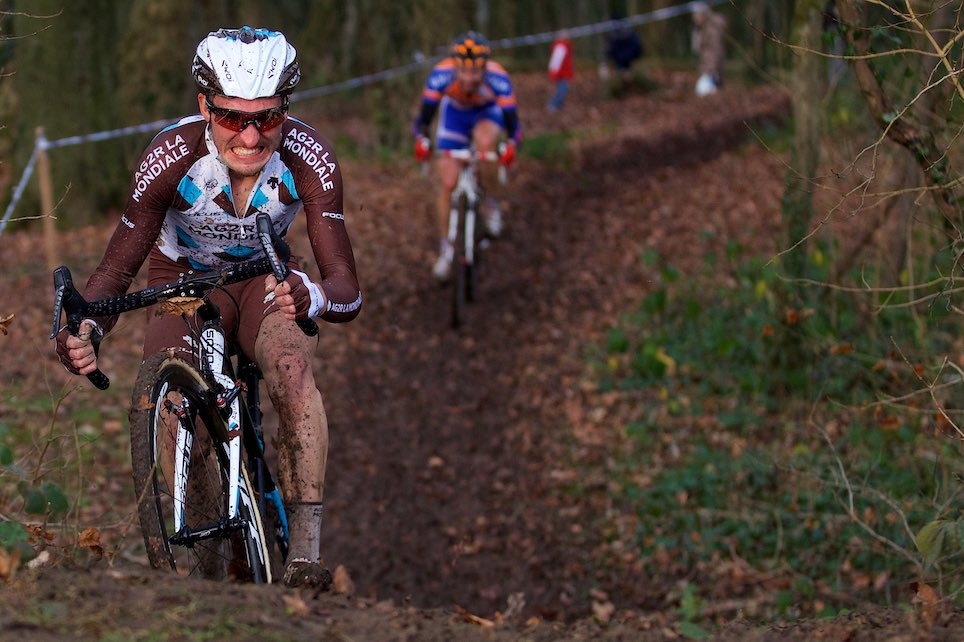
1DX – 70mm – 1/800 – 1600 ISO – f/2.8
 Correct white balance using an ExpoDisc and the camera’s custom white-balance function.
 Automatic white balance in a venue lit by sodium-vapor lamps (2200 K).
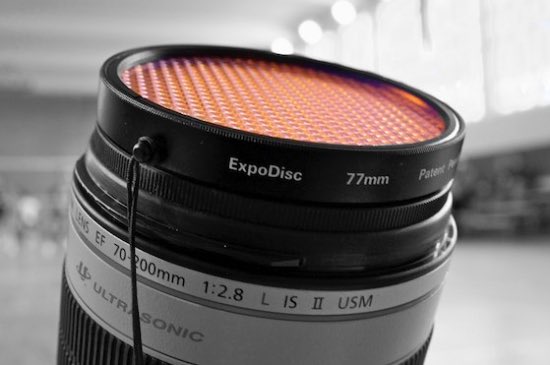 An ExpoDisc allows you to adjust white balance optimally, even in a venue with orange lighting.
If you use RAW format, you can very easily correct white balance during post-processing without degrading your images and apply it to the whole series to save time, but you still need to photograph a white sheet (or use an ExpoDisc) during your assignment so that your software knows which calibration to apply. Finally, and this is every sports photographer’s worst nightmare: venues using cyclical lighting! With this type of lighting, a burst of 10 images in one second with fixed exposure (1/1000 - f/2.8 - 4000 ISO, for example) and a fixed custom white balance (3000 K, for example) will produce a very heterogeneous series: different color rendering and exposures from one image to another. This is caused by the phase difference of lighting powered by the electrical grid delivering alternating current at a frequency of 50 Hz (50 variations per second): a variation invisible to the naked eye, but captured by an SLR at a high shutter speed. There is no real solution apart from shooting RAW so you can correct it during post-processing. Often in a burst, the most interesting photograph is the one with poor exposure and an unusual white balance... you have to live with it!
How to choose a lens?
The lens is the component that has the greatest impact on image sharpness [...]
How to choose a camera?
Today, the choice is mainly between mirrorless cameras and the used market [...]
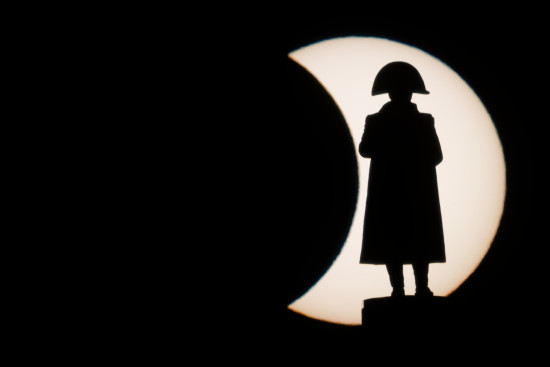
How I photographed Napoleon during the solar eclipse?
An image like this does not happen by chance [...]
How I set up my camera
There is obviously no universal setting that works for every situation. The choices [...]
How to choose a camera bag
Finding the perfect camera bag to carry and protect your valuable equipment is [...]

How to choose a computer?
Clearly, in 2026, any recent laptop or desktop computer, whether PC or Mac, can [...]
How to choose a speedlight?
A speedlight is far from essential for taking good photographs. Recent cameras [...]
Photographing amateur football
For those getting started in sports photography, covering an amateur football match is a good choice [...]
Recovering deleted photos
Accidentally deleting the contents of a memory card by formatting it can happen to anyone: don't panic [...]

My workflow with DxO and Photo Mechanic
Why I spend less than a minute (per photo) on post-processing my assignments [...]
Photographing sports
Sports photography is quite a challenging field to master. It requires [...]
Getting press accreditation
Press accreditation is the essential pass that allows you to photograph a concert, event [...]
Photographing a concert
Photographing a concert or show is relatively complex, but very rewarding [...]
Photographing a sunset
Photographing a sunset is a real treat for both the eyes and the photographer, impossible to [...]
10 tips for better photos
A few tips, in no particular order, to avoid common mistakes. The very first tip [...]
How to create a panning effect?
Essential for photographing motorsports such as rallies, F1 or [...]
Photography in the rain
As I live in Pas-de-Calais, I should have some expertise when it comes to answering this [...]
Photography basics
When taking a photograph, the photographer can adjust four parameters to compose and control [...]